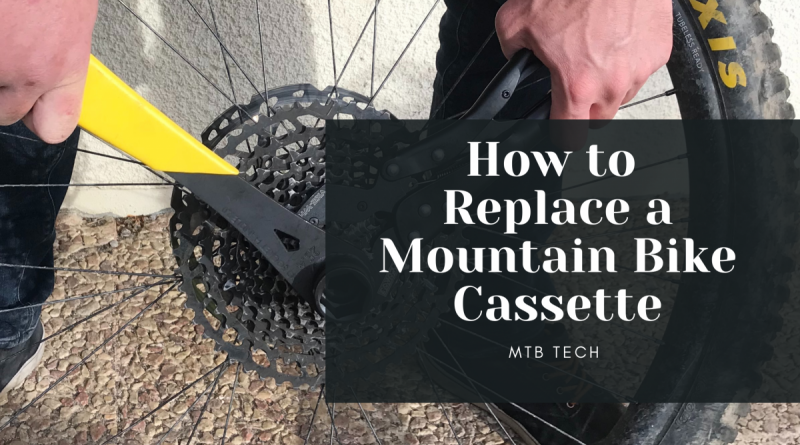
How to Replace a Mountain Bike Cassette (Step-By-Step Guide)
In this simple step-by-step guide, we walk you through everything you need to know about replacing your cassette. Starting from when and why you need to replace your cassette, to the tools required and a simple step-by-step guide with clear photos. keep on reading to learn more.
- What Tools Do You Need To Change A Cassette?
- Step 1: Remove the rear wheel
- Step 2: Lock cassette in place
- Step 3: Insert the lockring tool and loosen
- Step 4: Detach the chain whip, remove the cassette
- Step 5: Clean and degrease the freehub body
- Step 6: Grease freehub body
- Step 7: Install a new cassette on the freehub body
- Step 8: Tighten the cassette
- Step 9: Check cassette installation, and refit back onto the bike
- Are Mountain Bike Cassettes Universal?
- Are Both Shimano And Sram Cassettes Interchangeable?
- Should I Replace Chain And Cassette Together?
- Choosing The Correct Cassette Lockring Tool
- Why Do Mountain Bike Cassettes Wear Out?
- Why Should You Regularly Clean, Degrease, And Lubricate Your Chain And Cassette?
- How To Know When Your MTB Cassette Needs Replacing?
- How Do I Choose Which Mountain Bike Cassette?
- What To Do If Your Cassette Is Stuck On The Freehub Body?
- What Does It Cost For A Bike Shop To Replace A Mountain Bike Cassette?
What Tools Do You Need To Change A Cassette?
- Chain whip
- Cassette lockring tool (Use the correct lock ring tool for your cassette)
- Large adjustable crescent wrench
- Disposable gloves
- Degreaser
- Grease
- Clean Rag or cloth
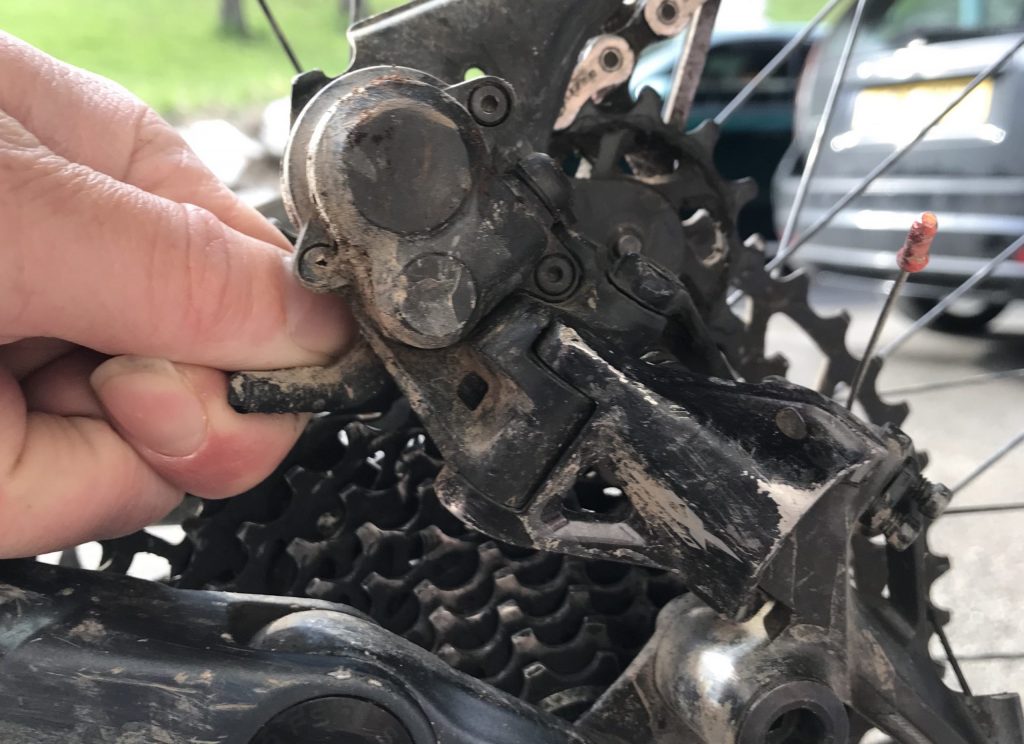
Step 1: Remove the rear wheel
Start by shifting into the smallest cog on the cassette which will help when taking the wheel on and off. If using a modern Shimano derailleur turn off the clutch, and if using a modern Sram derailleur push the jockey wheels forward and press the lock button (this gives you space to take the wheel on and off). Lastly, loosen off any quick releases, or unscrew the Maxle holding on the rear wheel, and pull out the rear wheel.
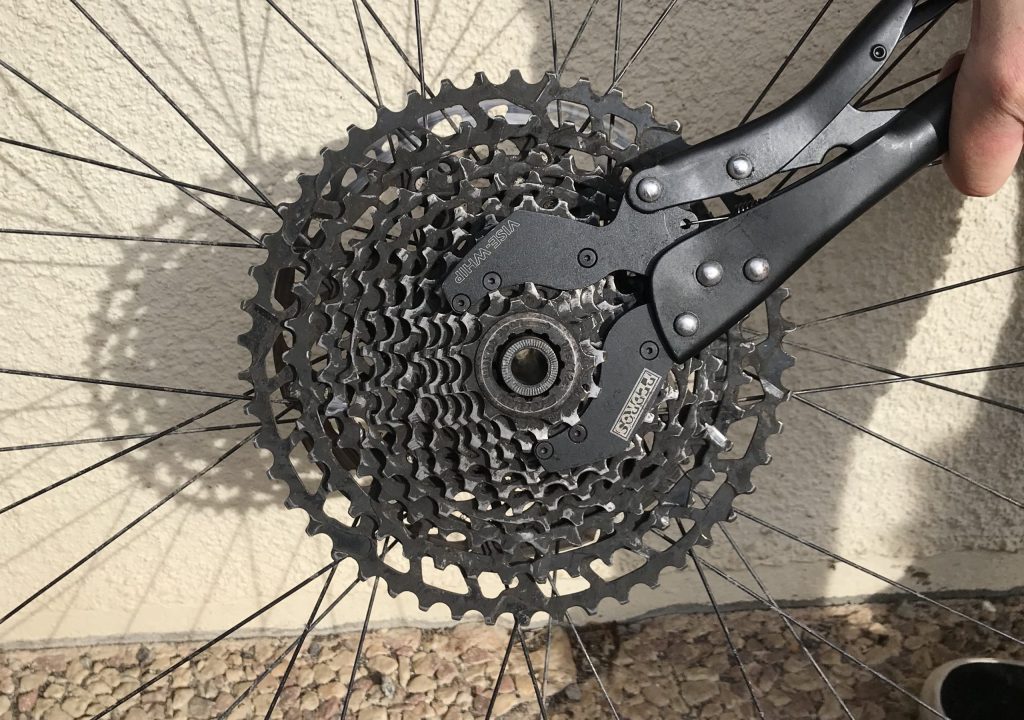
Step 2: Lock cassette in place
Place the wheel on the ground between your feet with the cassette pointing away from you. Use a chain whip or cassette pliers to lock the cassette in place. Wrap the chain whip chain around the cassette ensuring the chain links are well fitted into the cassette. Once you have either your chain whip or cassette pliers fitted, pull firmly to ensure the cassette does not move or slip against the tool.
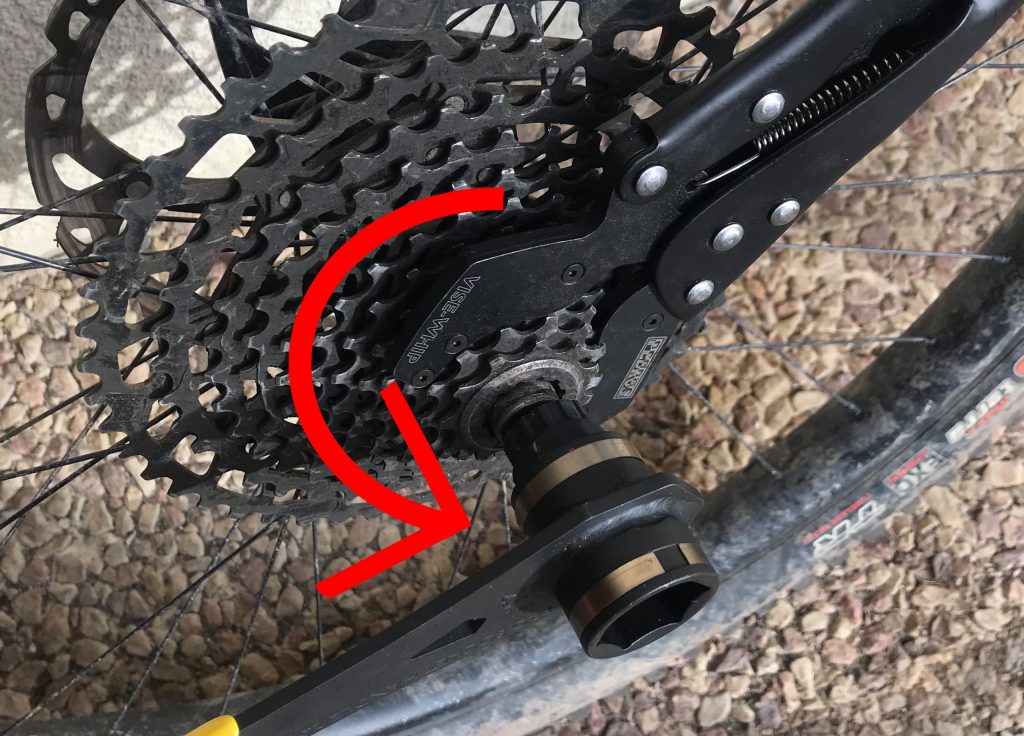
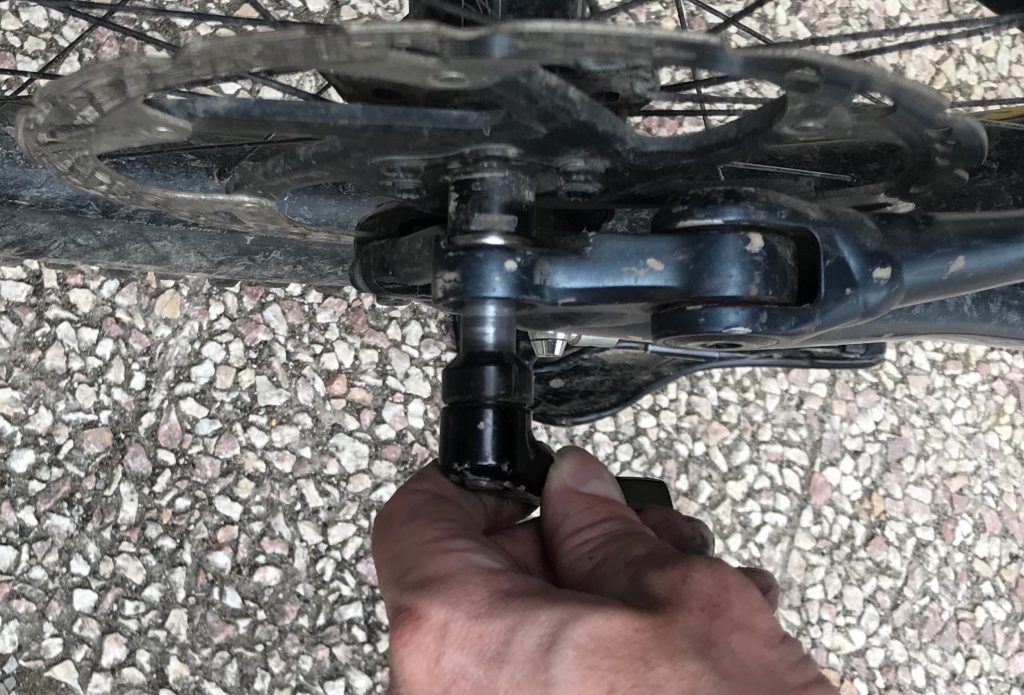
Step 3: Insert the lockring tool and loosen
Select the appropriate lockring tool for your cassette, axle, or quick-release type (if unsure check out our guide above). Insert the lockring tool and turn it in a counter-clockwise direction, with a large wrench. Remember this should loosen off easily, don’t force it!
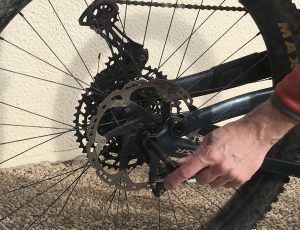
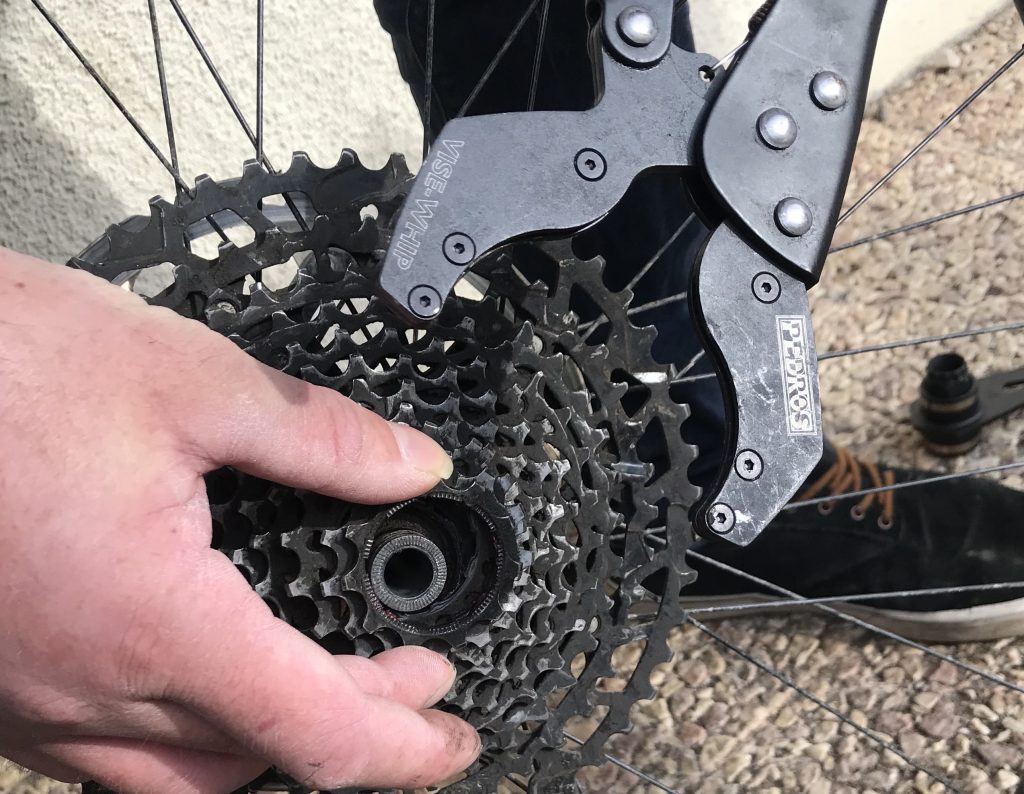
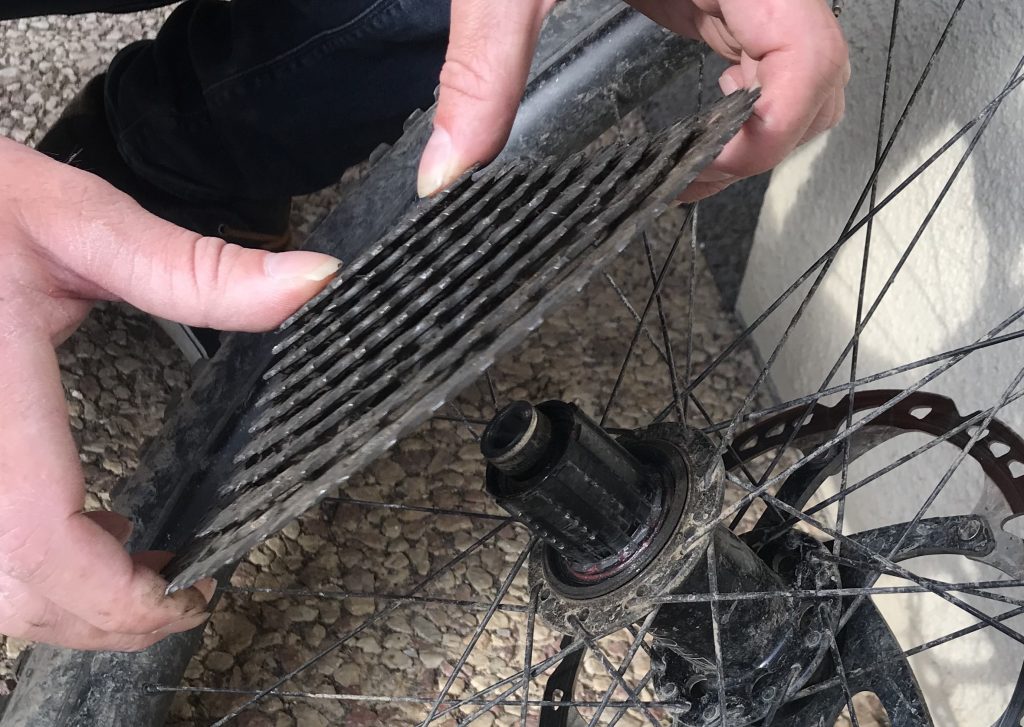
Step 4: Detach the chain whip, remove the cassette
(Shimano freehub cassette removal). Once the lockring has been loosened a full turn with the tool, you should now be able to completely unscrew it by hand. You can now remove the chain whip or cassette pliers. Next, pull the cassette off the freehub, and place it to one side (When pulling off the cassette, avoid removing the freehub body, by pushing the freehub body into the hub, as you pull off the cassette). Many cassettes will come off the freehub body in a number of pieces and spacers. If you intend of reusing the cassette it can be a good idea to tie all the pieces together.
(Sram XD freehub cassette removal). Once you have got the lockring tool turning (anti-clockwise), you should be able to remove the whole cassette by hand, it will literally unscrew from the freehub body.
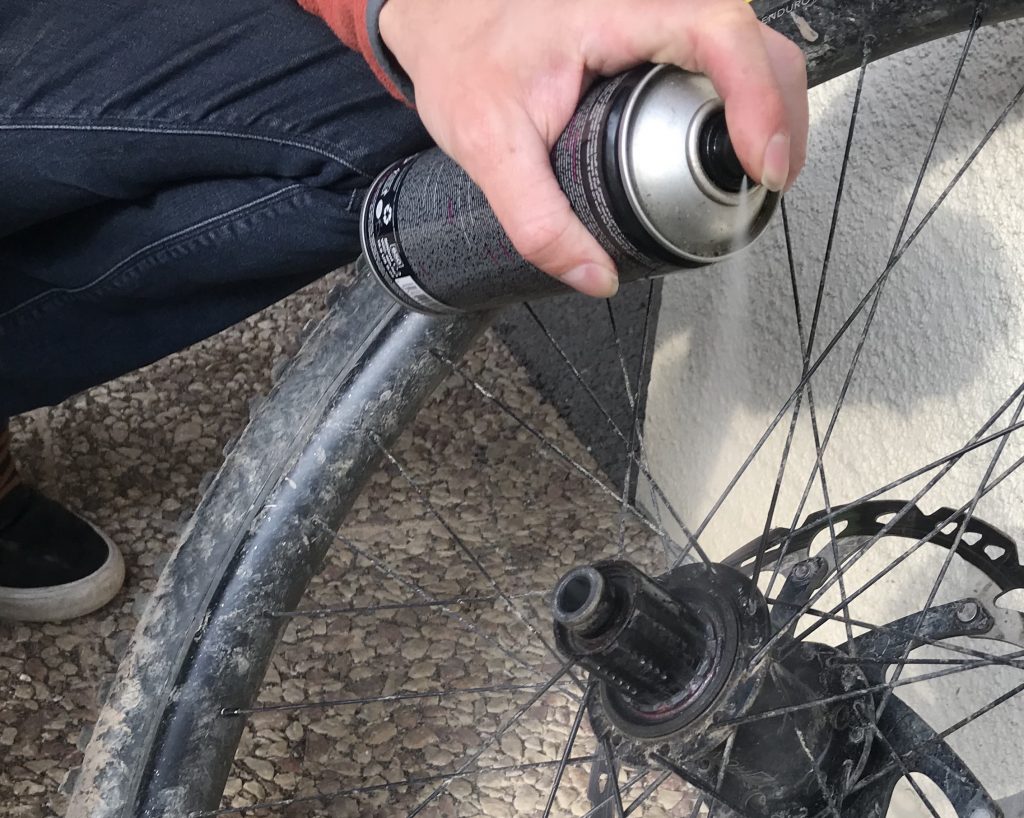
Step 5: Clean and degrease the freehub body
(Both Shimano and Sram XD). Spray a small amount of degreaser on the freehub body, and some more on a rag/workshop roll. Wipe the freehub body as clean as you can. Be careful not to use too much degreaser, as you don’t want to remove the grease from inside the hub.
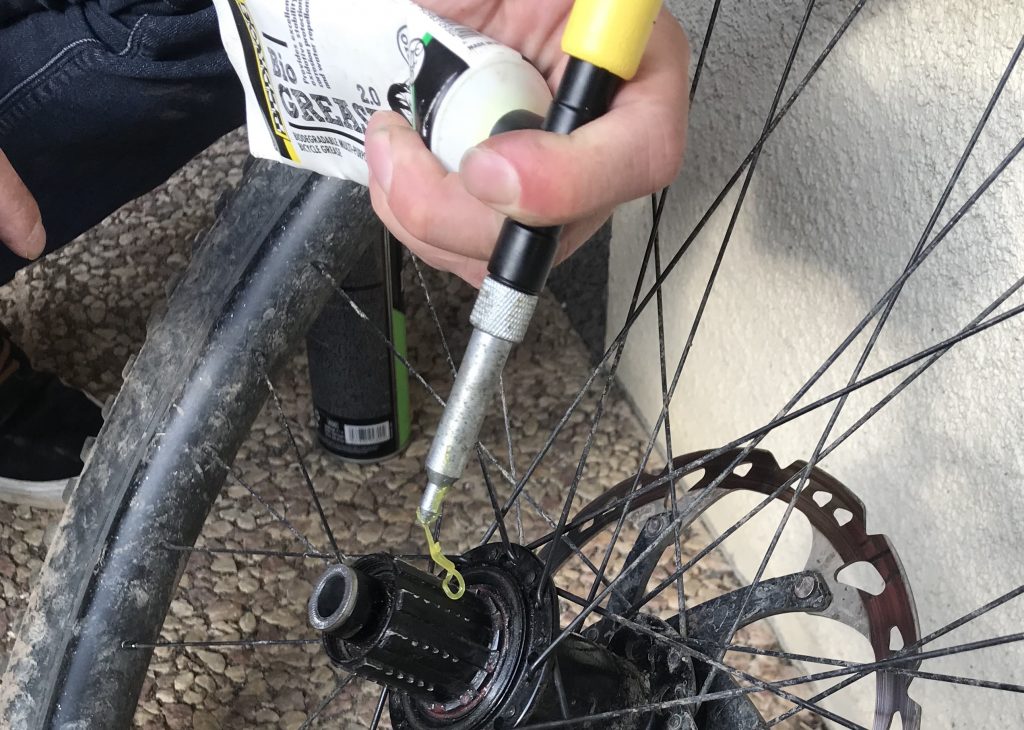
Step 6: Grease freehub body
Apply a small amount of grease to the freehub body. This is will make the new cassette easier to install and will prevent the new cassette from seizing to the freehub body. Remember only to apply a thin coat of grease, too much grease can be as bad as none at all.
Step 7: Install a new cassette on the freehub body
(Shimano freehub body) Install the new cassette onto the freehub body. Starting with the largest cogs in order of size. Cassettes have 12 slots, and 1 very narrow slot, line this narrow slot up with the corresponding narrow spline on the freehub body (the cassette rings only fit one way, so don’t force it if they won’t go on). If your cassette came with a large spacer, insert this before installing the new cassette, this is for wider-spaced hubs (if it’s not required, the lockring will normally not tighten).
(Sram XD freehub body) A Sram XD driver-compatible cassette is installed by placing the cassette on the freehub body, and turning the cassette clockwise until you feel the threads engage with threads on the freehub body.
Step 8: Tighten the cassette
(Shimano freehub body). Re-insert the cassette lockring and the lockring tool. Tighten the lockring onto the cassette, being careful as the treads on the freehub body are fragile. Tighten until the cassette is tight, but don’t force it! If you have a torque wrench you can torque a Shimano cassette lockring to 29.4–49Nm, or a Sram cassette lockring to 40Nm (However, always double-check these numbers before tightening a lockring as manufacturers update their torque settling). Here we have a base guide of common torque settings.

(Sram XD freehub body). Tighten the Sram XD freehub securely. If you have a torque wrench tighten it to 40Nm.
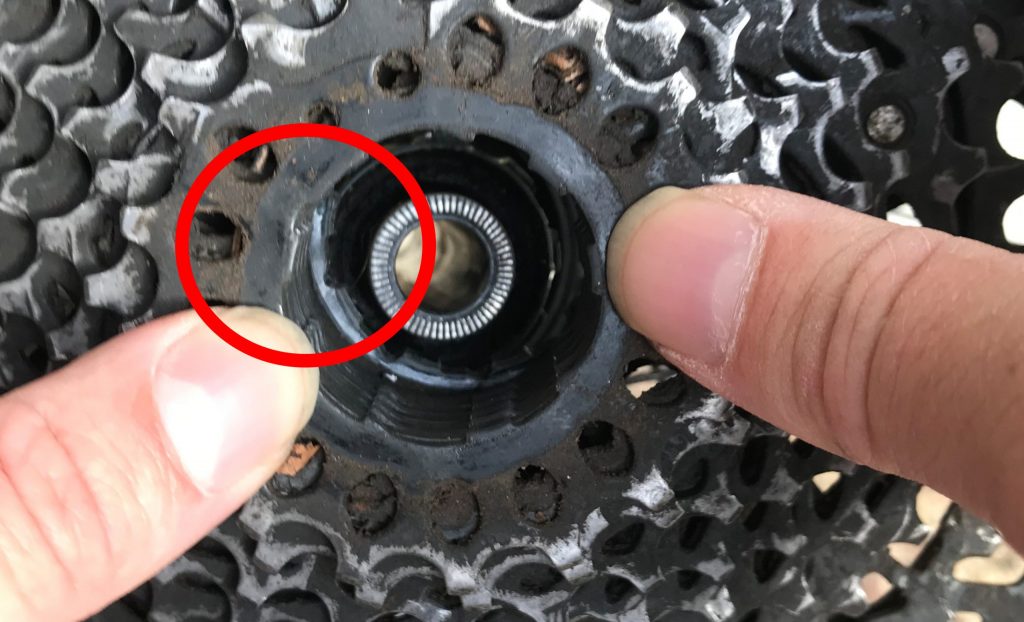
Step 9: Check cassette installation, and refit back onto the bike
Once you have the cassette is secured on the freehub, slowly turn the cassette ensuring the distance on each cog is equal and making sure there are no gaps around the lockring or at the back of the cassette. Once you’re happy the cassette is installed correctly, refit the rear wheel back onto the bike, remember to engage the clutch derailleur if applicable, and secure the quick release or axle correctly.
Once the wheel is back on the bike, have a shift through all the gears checking the gears work as they should, and that the freehub moves freely. Lastly, take the bike for a quick pedal, this the best way to ensure there aren’t any issues.
Awesome job! You have just changed your cassette.
Are Mountain Bike Cassettes Universal?
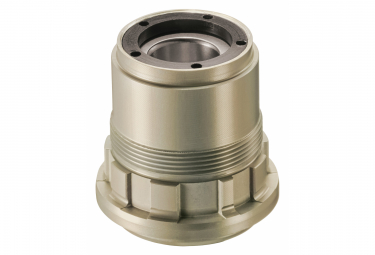
Not anymore. There are two common types of mountain bike cassettes: SHIMANO and SRAM XD compatible cassettes. The classic Shimano cassette just slides on and is secured with a lock ring. A Sram XD compatible cassette screws directly onto the freehub body. If you need to replace your cassette, your will need to make sure you order the correct cassette by removing your old cassette to see which freehub body you have. If Your bike is pre-2015 it will almost certainly be Shimano.
Are Both Shimano And Sram Cassettes Interchangeable?
Yes, Shimano and Sram cassettes are perfectly interchangeable, due to being spaced the same. However, make sure you acquire the right cassette fitting for your freehub body (Shimano or Sram XD).
Should I Replace Chain And Cassette Together?
It’s commonly thought you always need to replace the chain and cassette at the same time, however, this is not the case. You should be able to get 2-3 chains for every one cassette if you replace your chain before it’s more than 80% worn. This is why is good to own a chain wear indicator tool. However, if you have been using the same chain for ages, then it’s probably a good idea to replace them both at the same time.
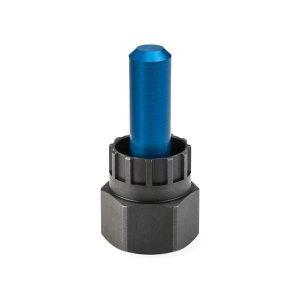
Choosing The Correct Cassette Lockring Tool
Most cassette lockrings require an FR-5.2 lockring tool, which has 12 notches, and a diameter of 23.5mm. These tools fit most common brands like Shimano, Sram, Chrisking, etc. These common FR-5.2 lockring tools also work on other fasteners on the bike like: suspension fork lowers, crank extraction nuts, centre lock disk brake disks. Also, most Lockring tools will also fit torque wrenches.
Here are the different types of lockring tools:
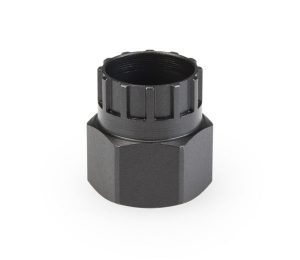
FR-5.2. The tool has 12 notches with a diameter of 23.5mm. A large pass-through hole, perfect for axle hubs with fixed axles, and stiff quick releases as you can tighten the tool on with the head of the quick release.
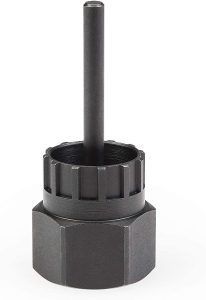
FR-5.2G. This tool is made to use with quick-release hubs, as the tool features a guide pin that helps fix the tool in place, reducing slippage and rocking while using the tool.
FR-5.2GT. This tool has a 12mm guide stud, designed to be used on hubs that have 12mm through axles. The stud also reduces slippage and rocking while using the tool. This tool only works hubs with a 12mm or larger hole.
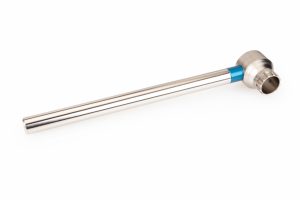
FR-5.2H. This tool has a very large passthrough hole (that even fits over most quick-release nuts) and also features a long built-in handle which is super practical as you don’t need to hold two tools in position.
Why Do Mountain Bike Cassettes Wear Out?
All bike cassettes wear out due to a few main factors, friction, chain stretch, and insufficient lubrication. The main factor is friction between the chain and cassette, and this friction greatly increases when the chain becomes stretched which is why it’s important to replace a chain before it becomes too stretched. You can purchase a tool that will tell you if your chain is stretched, or just ask your local bike shop. If you replace your chain regularly you can get easily get 2-3 chains use before you need to replace a cassette.
Why Should You Regularly Clean, Degrease, And Lubricate Your Chain And Cassette?
When your chain is covered in sticky old chain lube, grease, mud, or sand, it will act as a grinding paste that will wear down your cassette really fast. So it’s important to remember to regularly (15-20hours riding, less if riding in mud) clean and degrease your entire drivetrain. Once you’re done remember to finish by applying an appropriate wet/dry lubrication depending on the riding conditions.
How To Know When Your MTB Cassette Needs Replacing?
It’s worth starting to keep an eye on your cassette after around 1000 miles of riding (or less if riding lots in wet muddy conditions).
Common signs of a worn cassette are:
- Damaged or missing cassette teeth. Slowly spin the cassette and look out for any damage or missing teeth.
- Bent or twisted cassette rings. Quickly spin the cassette, and ensure everything is straight.
- Shark teeth/Shark Finning. This is when the leading edge of a cog’s teeth will start to curve inwards, resembling a shark’s fin.
- Bad shifting. If you have replaced the chain recently, checked your derailleur hanger is straight, and check your gear is set up correctly. Then it’s likely your cassette has worn out.
How Do I Choose Which Mountain Bike Cassette?
The type of mountain bike cassette you choose will depend on a number of factors, the first being the type of mountain biking you do; XC, Trail, Enduro, DH, etc. Other factors include, do you have a front derailleur? Your level of fitness? and you’re level of experience and skill. You also have an option of different speeds of the cassette; 7 speed 8 speed, 9 speed, 10 speed, 11 speed, 12 speed, and 13 speed.
If you are doing a type of mountain biking where you pedal up and down hills, you will need a wide range of gears especially as most modern mountain bikes don’t have front derailleurs (Click here to see why modern mountain bikes have no front derailleurs). However, if you are for example just riding downhill then you will only need a minimal amount of gears (most DH bikes are only 7-speed).
For XC, Trail, and Enduro the cassette of choice is normally a 10-50T, 12-speed cassette (520%)
For DH the cassette of choice is: 10-24 7 Speed cassette (240%)
What To Do If Your Cassette Is Stuck On The Freehub Body?
Sometimes the cassette gets stuck on the freehub body. When this happens you need to very carefully tap it with something soft; like a wooden handle for a mallet. If it does not move with a gentle tap, try and tap it at different points around the cassette until it dislodges. The key is patience if you want to avoid damage to the cassette.
What Does It Cost For A Bike Shop To Replace A Mountain Bike Cassette?
The average labor cost to fit a cassette is around $25 (£20/17euros).
However, in the long run, we recommend buying the tools and learning to do it yourself. Apart from saving money, you can’t call yourself a true mountain biker unless you can take care of your own bike.
You may also be interested in: