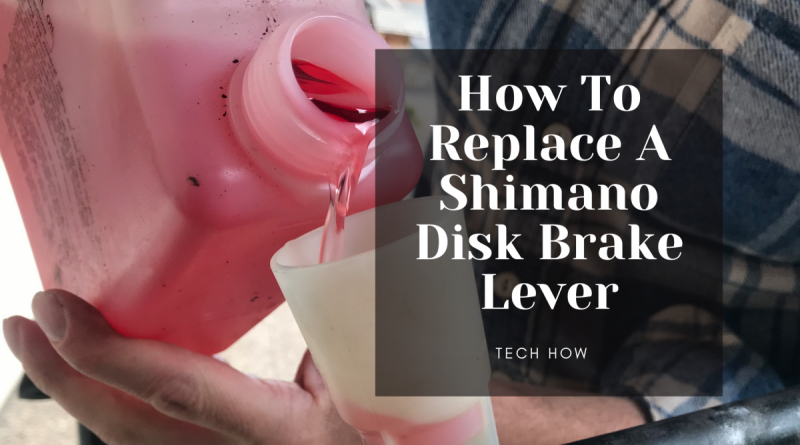
How To Replace A Shimano Disk Brake Lever? (Easy Step-By-Step)
In this simple guide with photos, we show you how to replace a Shimano disk brake lever. We take you through all the steps and answer any questions you may have. Replacing a Shimano brake lever is quick and simple with the right know-how and the correct tools.
Bike Faff
- What Tools Do You Need To Replace A Shimano Disk Brake Lever?
- How To Replace A Shimano Disk Brake Lever? (Step-By-Step)
- Step 1. Remove Grip
- Step 2. Loosen 8mm Hose Bolt
- Step 3. Slide Lever Off the Bars
- Step 4. Slide New Lever On
- Step 5. Swap Hose from The Old Lever to New the Lever
- Step 6. Remove Bleed Port Screw
- Step 7. Attach Shimano Bleed Funnel
- Step 8. Add Oil & Squeeze the Lever
- Step 9. Once No Bubbles Replace the Bleed Port Screw
- Step 10. Reattach Grip, Degrease and Check for Air
- How Do You Prevent Shimano Mountain Bike Brake Levers From Getting Damaged?
- Signs That Your Shimano Brake Lever Might Need Replacing
- Frequently asked questions
What Tools Do You Need To Replace A Shimano Disk Brake Lever?
- Shimano bleed funnel
- Shimano mineral oil
- 8mm wrench (avoid adjustable wrench if possible)
- 2m, 2.5mm, 4mm Allen key
- Disk brake cleaner
How To Replace A Shimano Disk Brake Lever? (Step-By-Step)
This tutorial is just how to replace a lever, not how to do a full Shimano brake bleed, as a full brake bleed is not normally required for replacing a brake lever.
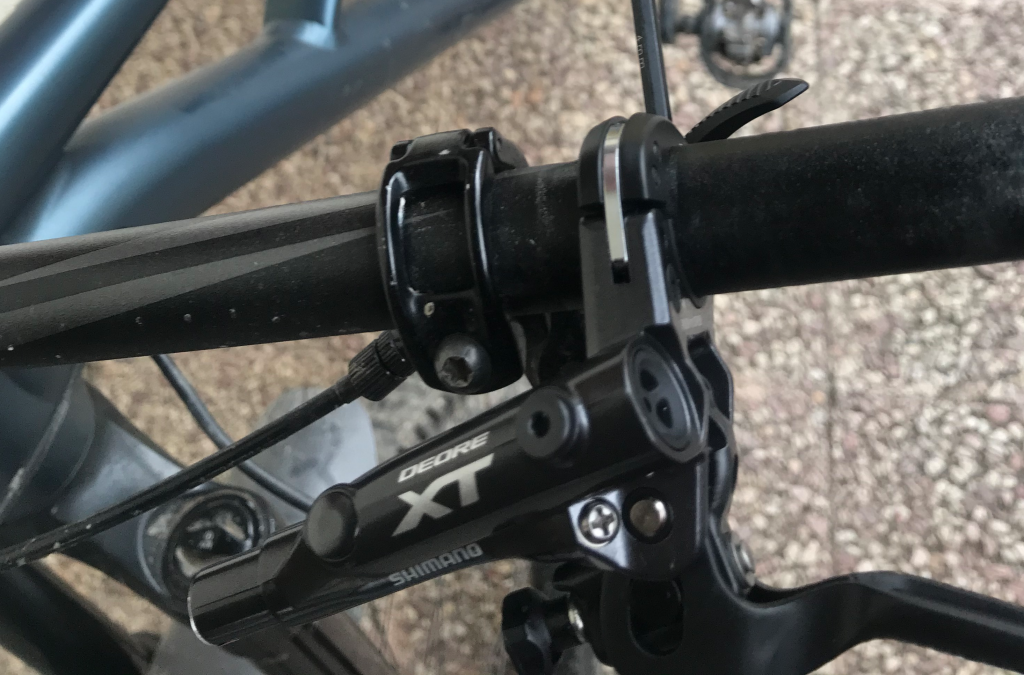
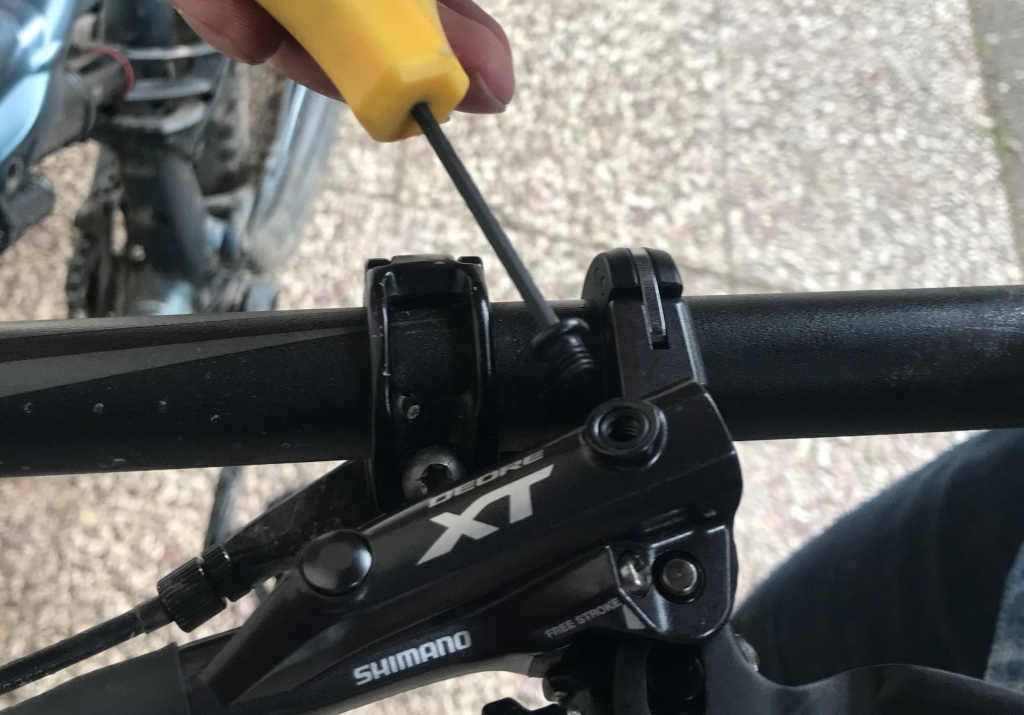
Step 1. Remove Grip
Most grips are lock-on grips, which will require just a 2mm or 2.5mm Allen key bolt to be loosened before it will slide off.

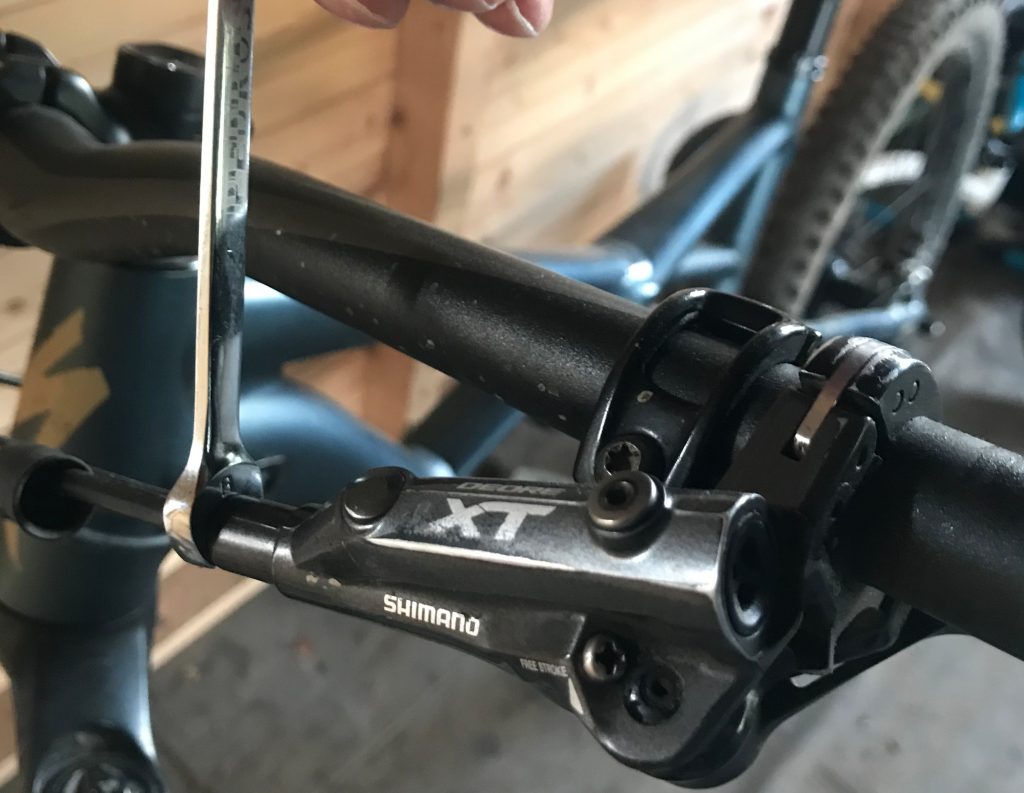
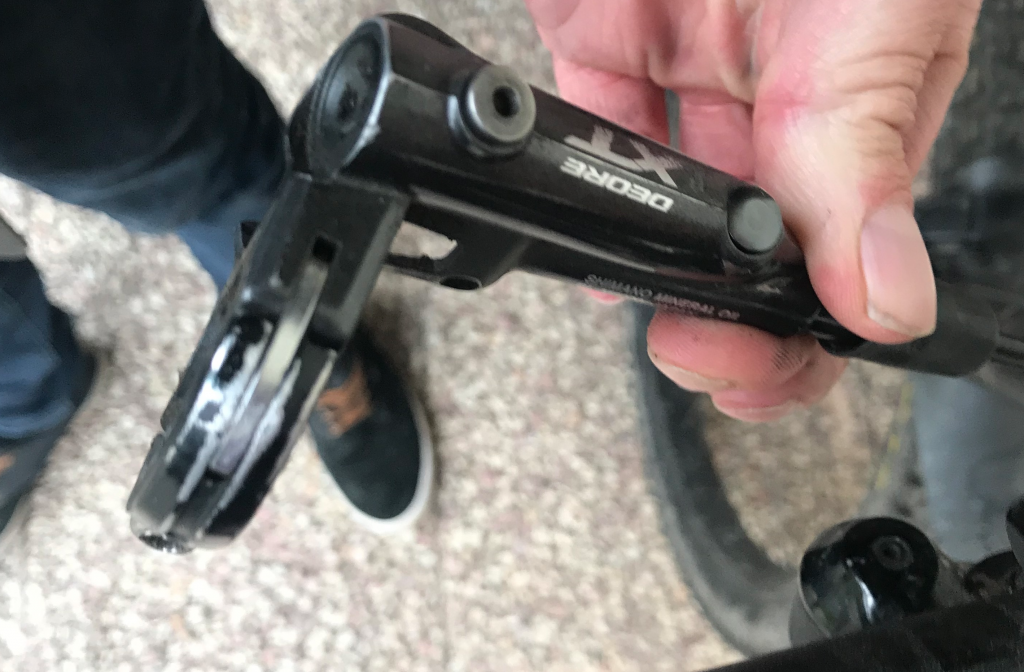
Step 2. Loosen 8mm Hose Bolt
Lightly loosen the 8mm bolt, which attaches the brake to the lever. Only use an 8mm specific wrench, an adjustable can round the bolt. Loosen to the point where it’s just hand tight, but leave it still attached.
Step 3. Slide Lever Off the Bars
Loosen off the 4mm Allen key bolt, then slide the lever off the bars and gently let it hang down.
Step 4. Slide New Lever On
Slide the new lever onto the handlebars, and tighten the lever into position, so the bleed port is sitting horizontal.
Step 5. Swap Hose from The Old Lever to New the Lever
Line both the old and new lever up next to each other. Unscrew the 8mm bolt from the old lever by hand. Once fully unscrewed, it will probably require a firm tug to release the hose from the lever. Once the hose is removed, quickly reinstall it into the new lever. It may also require a firm push to fix the olive into the new lever. Now fully tighten the 8mm hose bolt until the correct torque is reached (5-7Nm), or until it’s tight.
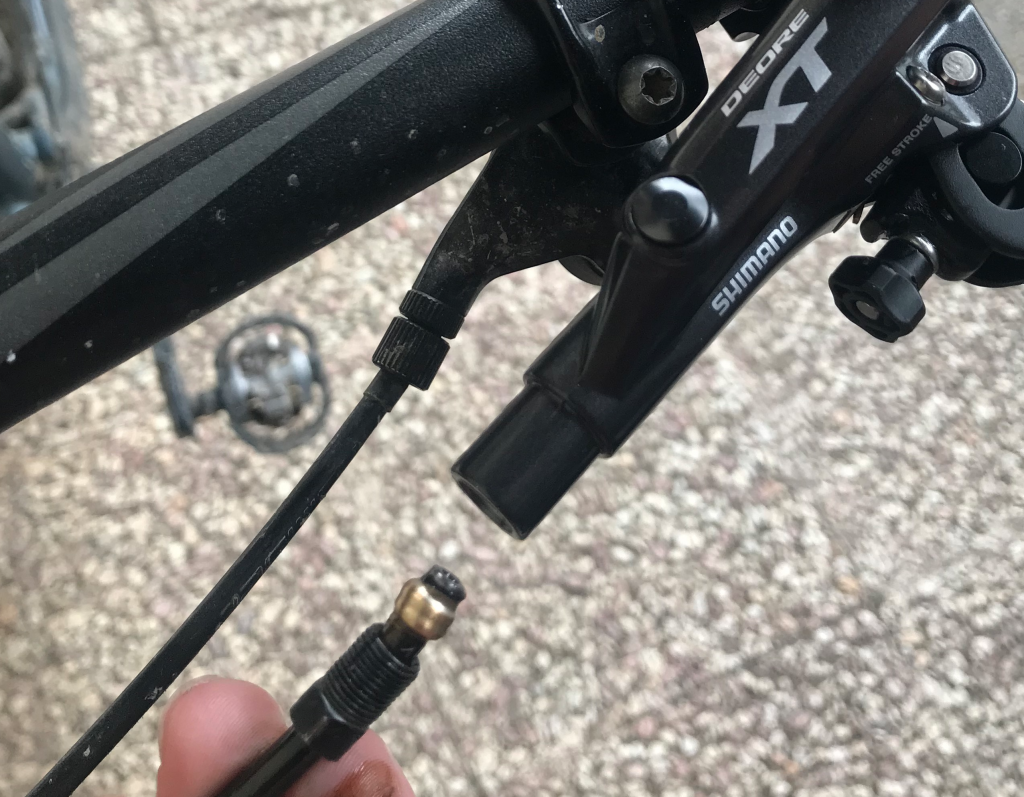
Step 6. Remove Bleed Port Screw
Now remove the bleed port screw with a 2mm Allen key. Remember to put this small screw somewhere safe where it won’t get lost.
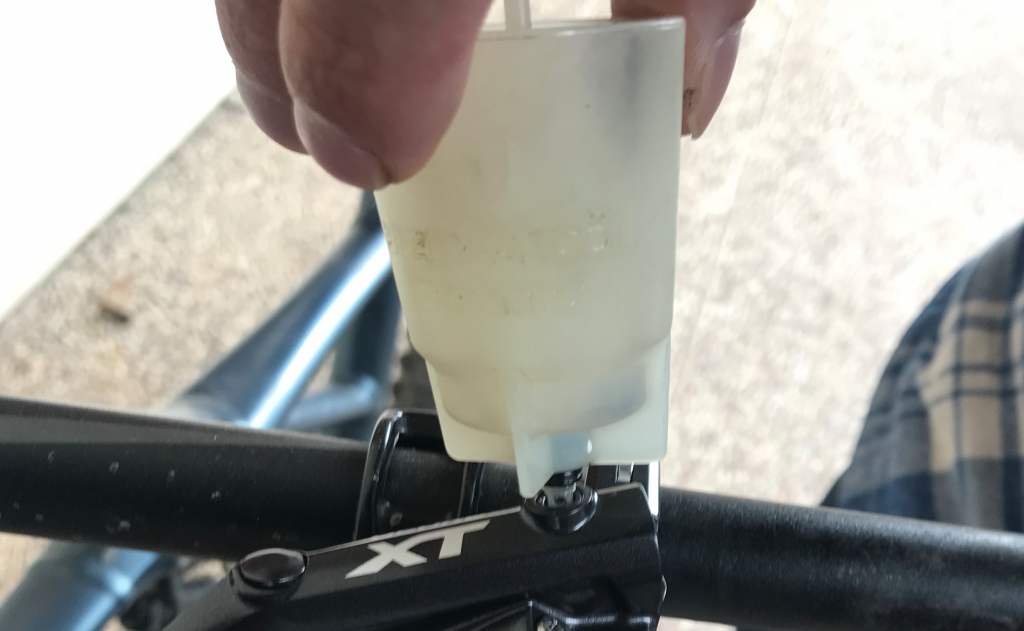
Step 7. Attach Shimano Bleed Funnel
Carefully screw on the Shimano bleed funnel until it’s lightly tight, and remove the center plug. Place the base of the funnel to one side but still on hand.
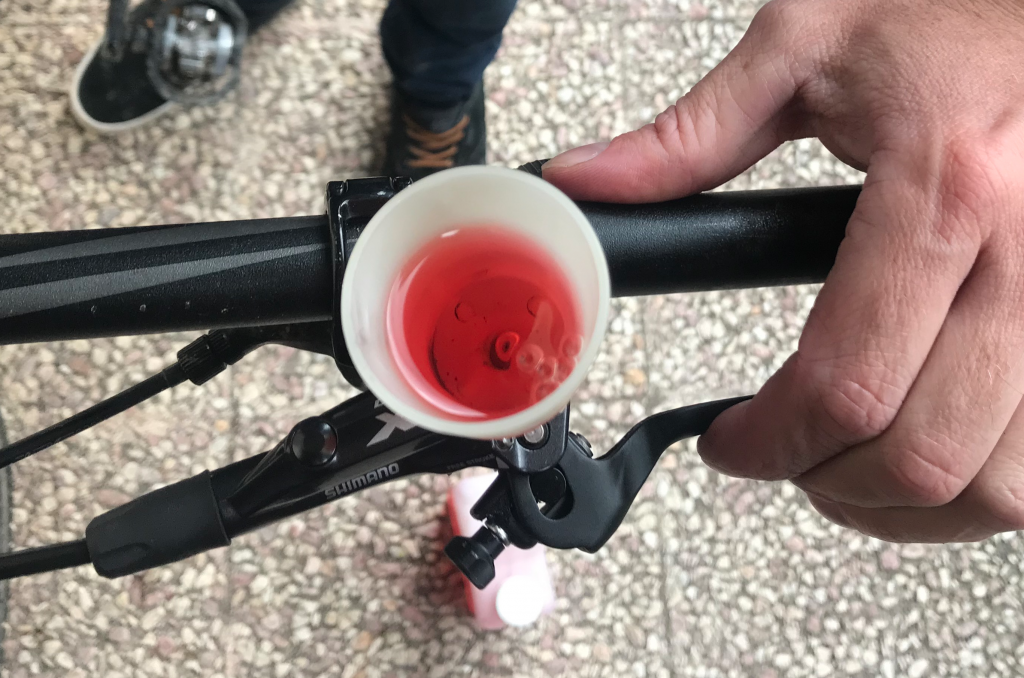
Step 8. Add Oil & Squeeze the Lever
Now pour the Shimano mineral oil into the funnel until it’s 1/3 full. Pump the lever lots in and out, and you should see bubbles. If you notice the brake fluid changes color to a dark gray color, then this is a sign you need to do a full brake bleed to replace all the brake fluid in the system.
Step 9. Once No Bubbles Replace the Bleed Port Screw
Keep on pumping the lever until you do NOT see any more bubbles. Once you don’t see any more bubbles pull the lever firmly a few times and see if that releases any last bubbles. Once you’re 100% sure there are no more bubbles coming out, replace the Shimano bleed funnels plug, unscrew the funnel and then place the funnel back onto its base. Now carefully reattach the bleed screw.
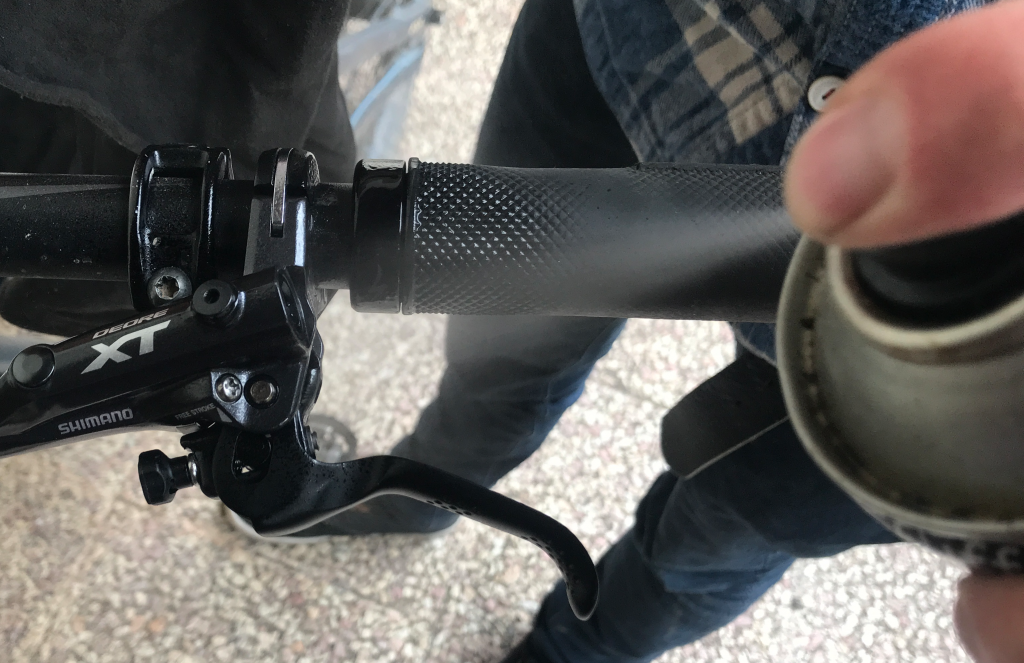
Step 10. Reattach Grip, Degrease and Check for Air
Replace the grip and fasten it back into position on the handlebars. Now Loosen off the brake lever and set it to your preferred position. Ensure there is no brake fluid left on the brake lever or handlebars by cleaning with disk brake cleaner and a rag. Lastly, give the lever a good few squeezes, it should feel firm with an excellent bite point.
How Do You Prevent Shimano Mountain Bike Brake Levers From Getting Damaged?
- Keep clean. Keeping your brake levers clean is a great way to prevent contaminants from getting into the master cylinder. Wash your levers off with a hose, and then spray with a degreaser wiping off any excess debris. Remember to pay attention to the inside of the lever and where the hose attaches to the lever.
- Take care when storing or traveling. It’s unbelievable how much damage occurs to bikes when they are not stored correctly. To protect your brake levers, do NOT store upside down, as this often helps push air through the seals. Also, make sure it not likely to get bashed by any friends or family members. When putting your bike in the car, remember to pad out the brake levers and not to put anything heavy on top of the bike. If you are flying with a bike bag or bike box, remember to remove the handlebars and use the frame to protect fragile things like brake levers.
- Bleed brakes often. If you do not bleed your brakes very often, it’s likely your brake fluid with turn black with contaminants. This contaminated fluid will likely damage the master cylinder in the lever or seals in the caliper.
Signs That Your Shimano Brake Lever Might Need Replacing
Here are some things you may want to look out for if you suspect that your brake lever is faulty:
- Sticky lever. If you notice your brake lever is starting to stick and stay compressed when you pull the lever, then this is a sign your main master cylinder needs replacing. However, just changing the master cylinder is fiddly, and replacement master cylinders can be hard to find. It’s much easier and quicker to just replace the whole lever.
- The brake needs bleeding often. If you find yourself continuously bleeding your brakes because they keep getting spongy, then it’s also quite likely a faulty master cylinder in the lever. The other possibilities are a faulty caliper seal or a damaged brake hose.
- Cracks and bends. It’s common for people to bend their brake lever blades (the part you pull with your fingers). However, if this is the case, you can just replace the blade. Always keep an eye out for signs of damage on the main lever body, like cracks, bends, or fatigue marks.
- Leaks. Keep an eye out for leaks on Shimano brake levers. These often occur around where the hose attaches to the lever body (ensure it’s tight), or on the inside of the brake lever where the lever pushes the master cylinder in. If you are unsure of a leak, clean with the lever with disk brake cleaner and pull the lever rapidly on and off while holding the lever with a paper towel. Then look for any residue on the towel.
Frequently asked questions
Resources