The Ultimate Guide to Bike Gears: (Mastering Bicycle Transmissions)
Welcome to “The Ultimate Guide to Bike Gears” – your go-to resource for everything you need to know about bicycle gears. In this guide, we’ll cover what bike gears are, how they work, and most importantly, how to use them to optimize your ride.
Whether you’re a seasoned cyclist or just getting started, understanding your bike gears can completely change the way you approach different terrains and challenges. From steep hills to flat roads, your gears can help you find the perfect balance between speed and effort.
So, buckle up and get ready to unlock the full potential of your bike. By the end of this guide, you’ll be a gear-shifting pro, cruising effortlessly along the open road. Let’s dive in!
- 1. Introduction to Bike Gears
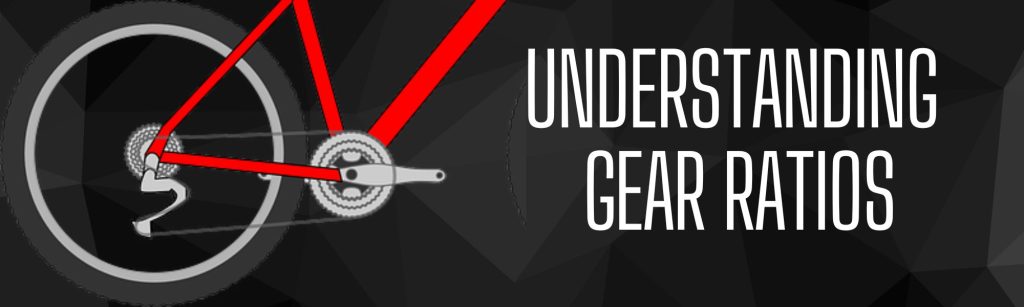
- 2. Understanding Gear Ratios
- What are gear ratios?
- How do gear ratios affect pedaling effort?
- How to calculate gear ratios?
- Simple Gear Ratio Calculator (plus when to use them)
- How does the cassette ratio affect riding?
- Cassette Range Calculator (what percentage is your cassette)
- How can I improve my bike's gear ratio?
- Improving ratio with chainring size
- 3. Types of Bike Gears
- 4. Bike Gear Components
- Final Thoughts
1. Introduction to Bike Gears
Why are bike gears important?
Bike gears are important because they allow cyclists to adjust their pedaling effort to the terrain they are riding on. By changing the gear ratio between the front chainrings and rear cassette, cyclists can make it easier or harder to pedal, depending on the incline and terrain. This not only makes it easier to tackle hills and headwinds, but it can also help prevent muscle fatigue and injury by allowing riders to maintain a consistent pedaling cadence.
How do bike gears work?
Bike gears work by adjusting the ratio between the size of the front chainrings and the rear cassette. The larger the chainring, the more difficult it is to pedal, while the smaller the chainring, the easier it is to pedal. Similarly, the larger the cassette cog, the easier it is to pedal, while the smaller the cog, the more difficult it is to pedal. By shifting the chain between different chainrings and cassette cogs, riders can adjust the gear ratio to suit the terrain.
Bikes typically have a system of levers, cables, and derailleurs that allow riders to shift gears while riding. The shifters control the cables, which in turn move the derailleur to move the chain between gears. Some bikes also have internal gear hubs or gearboxes, which allow riders to shift gears by twisting a grip shifter or pushing a button.
The history of bike gears
Bike gears have been around almost as long as bicycles themselves. The first bicycles, known as “boneshakers,” were fixed-gear machines with a single speed. In the late 1800s, though, inventors began to experiment with multi-speed systems. In 1896, French inventor Paul de Vivie (known as “Velocio”) developed a two-speed freewheel system that allowed riders to coast downhill without pedaling. By the 1920s, multi-speed bikes had become more common, with several different systems in use.

One of the most important developments in bike gearing came in the 1950s with the introduction of the derailleur system. This system used a moveable derailleur to shift the chain between different gears, allowing riders to quickly and easily adjust their gear ratio while riding. The derailleur system has continued to evolve over the years, with new materials and technologies improving its performance and reliability.
Today, most bikes come equipped with a wide range of gears, with up to 30 or more on some models. This allows riders to tackle a wide variety of terrain, from steep hills to flat roads. Advances in technology have also led to the development of electronic shifting systems, which use small motors to shift the gears automatically, and belt drive systems, which eliminate the need for a traditional chain.
2. Understanding Gear Ratios
What are gear ratios?
Bicycle gear ratio refers to the relationship between the number of teeth on the front chainrings (attached to the pedals) and the number of teeth on the rear cassette (attached to the rear wheel). Essentially, it describes the mechanical advantage or disadvantages provided by the gears.
How do gear ratios affect pedaling effort?
Your gear ratios are important for a few reasons. First, they allow a rider to adjust their effort to the terrain they’re riding on. For example, on a steep uphill, a lower gear ratio (meaning a smaller chainring in the front and a larger cog in the back) can make it easier to pedal and maintain a comfortable cadence. On the other hand, a higher gear ratio (meaning a larger chainring in the front and a smaller cog in the back) can help a cyclist go faster on a flat or downhill section.
Additionally, gear ratios can affect a cyclist’s speed and power output. A lower gear ratio will typically allow a cyclist to produce more power at a slower speed, while a higher gear ratio will require more power output to achieve a faster speed.
How to calculate gear ratios?
Calculating bike gear ratios is actually quite simple! To determine the gear ratio of a particular gear combination, all you need to do is divide the number of teeth on the front chainring by the number of teeth on the rear cassette.
For example, if your bike has a front chainring with 50 teeth and a rear cassette with 11 teeth, the gear ratio would be:
50 / 11 = 4.55
This means that for every revolution of the pedals, the rear wheel will turn 4.55 times.
You can use this formula to calculate the gear ratio for any combination of chainring and cassette sizes on your bike. Just remember that a smaller gear ratio (i.e. a lower number) will make it easier to pedal, while a larger gear ratio (i.e. a higher number) will require more effort but allow you to go faster.
here’s an example table of gear ratios with corresponding speeds and cadences at different RPMs:
| Front Chainring (teeth) | Rear Cassette (teeth) | Gear Ratio | Speed @ 70 RPM (mph) | Speed @ 90 RPM (mph) | Cadence for 15 mph (RPM) |
|---|---|---|---|---|---|
| 50 | 11 | 4.55 | 22.2 | 28.4 | 65 |
| 50 | 21 | 2.38 | 12.0 | 15.4 | 127 |
| 34 | 28 | 1.21 | 6.4 | 8.2 | 204 |
| 34 | 34 | 1.00 | 5.3 | 6.8 | 244 |
| 26 | 32 | 0.81 | 4.3 | 5.5 | 307 |
Note that these values are just examples and will vary depending on factors such as the size of the wheels, the weight of the rider, and the terrain being ridden. Additionally, the values shown here assume a constant level of effort from the rider, which may not be realistic in all situations.
Simple Gear Ratio Calculator (plus when to use them)
Bike Gear Ratio Calculator
A table that breaks down the recommended gear ratios for different types of riding:
| Riding Type | Recommended Gear Ratio Range |
|---|---|
| Downhill | 2.0 or higher |
| Flat | 1.5 to 2.0 |
| Uphill | 1.0 to 1.5 |
| Steep Uphill | 0.5 to 1.0 |
How does the cassette ratio affect riding?
Remember that these are just general recommendations and the ideal gear ratio will vary depending on your personal preferences, fitness level, and the specific terrain you’re riding on. But this table can serve as a helpful starting point for choosing the right gear ratio for your needs. Happy cycling!
Many riders are now choosing to switch to a 1x drivetrain, which features a single chainring on the cranks. However, some are concerned that this may not provide enough gears for their needs. To address this issue, we can help you find the right combination of cassette and chainring to suit your riding requirements.
Typically you’ll see information on the largest and smallest cog of your cassette. For instance, a 10-52 cassette has the smallest cog with 10 teeth and the largest cog with 52 teeth. To determine the gear range of your cassette, simply divide the largest cog by the smallest cog. In this case, the calculation would be 52/10 = 5.20 or 520%.
It’s interesting to note that calculating the gear range of your cassette can reveal how even a small change in the smallest cog can have a huge impact on your overall gear ratio. So, it’s worth taking the time to find the right combination of cassette and chainring to get the most out of your bike’s gearing.
Cassette Range Calculator (what percentage is your cassette)
Simply add your cassette’s smallest and largest cog into our calculator to determine your cassette’s range.
How can I improve my bike’s gear ratio?
Ultimately, the ideal gear ratio will depend on your individual preferences, riding type, and style. The table below with give you some insight into where to start.
| Riding Style | Ideal Gear Ratios |
|---|---|
| Road | 50/34 tooth chainring, 11-28 cassette (many opt for 1x single chain ring) |
| Commuting | 46/30 chainring, 11-32 cassette |
| Gravel | 42/28 chainring, 10-44 cassette |
| Trail Riding | 30t chainring, 11-50 cassette |
| Downhill | 30t chainring, 11-25 cassette (often 7 spd) |
Improving ratio with chainring size
Choosing the right cassette sets the gear range for your drivetrain, but you can tweak the gearing up and down by adjusting the chainring size. A smaller chainring makes it easier to climb hills in low gear, while a larger chainring lets you go faster in high gear. To calculate your gearing ratio, simply divide the number of teeth on your chainring by the number of teeth on the cassette cog (See our Gear Ratio Calculator above).
The table shows how gear ratio changes with chainring size:
| Chainring Size | Cassette Range | Gear Ratios (%) |
|---|---|---|
| 30T | 10-51 (510%) | 59%-300% |
| 32T | 10-51 (510%) | 62%-316% |
| 34T | 10-51 (510%) | 66%-336% |
| 36T | 10-51 (510%) | 70%-357% |
| 38T | 10-51 (510%) | 74%-378% |
The percentage format gives you a better sense of the difference in gearing between each chainring size. It’s important to choose the right gear ratios for your riding needs and abilities, so you can tackle any terrain with confidence!
3. Types of Bike Gears
Derailleur Gears
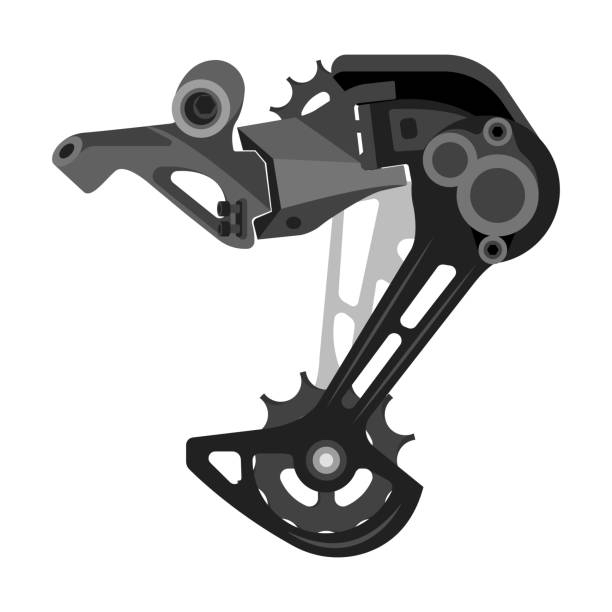
How derailleur gears work
Derailleur gears are a system of gears that allow you to change the ratio of your pedaling speed to the rotation of your bike’s wheels. This allows you to maintain a comfortable cadence and tackle different terrains with ease. The gears are controlled by shifting the chain between different-sized cogs on the cassette at the back wheel and different-sized chainrings at the front.
When you shift gears, the derailleur moves the chain from one cog or chainring to another. The derailleur is connected to a cable that’s controlled by a shifter on the handlebars. When you shift gears, the shifter pulls or releases the cable, which moves the derailleur and shifts the chain to a different gear.
Pros and cons of derailleur gears
Pros:
- Allows you to tackle different terrains and gradients with ease
- Provides a wide range of gear ratios to choose from
- Relatively affordable and easy to maintain
Cons:
- Can be noisy and require frequent adjustment
- Can be susceptible to damage from impact or debris
- Can be less efficient than other types of gearing systems
Types of derailleur gears (road, mountain, etc.)
There are different types of derailleur gears designed for different types of riding:
Road derailleur gears
These are designed for road bikes and provide a wider range of gears for faster riding on flat and hilly terrain. Often used short cage derailleurs.
Mountain derailleur gears
These are designed for off-road riding and provide a wider range of low gears for steep climbs and technical descents.
Hybrid derailleur gears
These are designed for hybrid bikes, which are a combination of road and mountain bikes. They offer a balanced range of gears for both on and off-road riding.
Internal Hub Gears
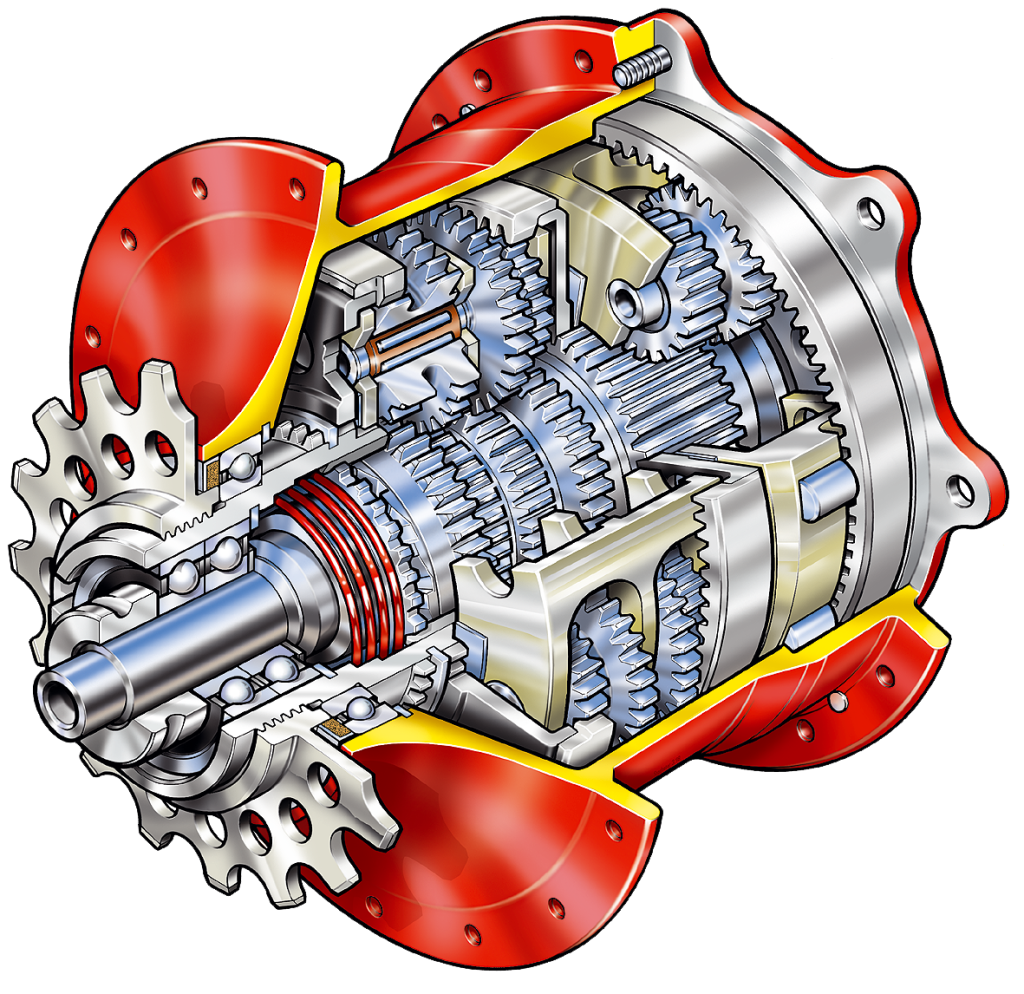
How internal hub gears work
Internal hub gears are a type of gearing system where the gears are located inside the rear hub of the bike. This means that the gears are protected from the elements and require less maintenance than derailleur gears.
In an internal hub gear system, a chain runs from the pedals to a sprocket attached to the rear hub. The hub contains a series of gears (often Planetary gears) that can be engaged or disengaged by a shifting mechanism located on the handlebars. When you shift gears, the shifting mechanism activates a cable that moves a set of internal gears, changing the gear ratio between the pedals and the rear wheel.
Pros and cons of internal hub gears
Pros:
- Require less maintenance than derailleur gears
- Can shift gears while stationary or under load
- Are better protected from damage and the elements, thus requiring less maintenance
- Can be quieter and smoother than derailleur gears
Cons:
- Typically provide fewer gear options than derailleur gears
- Can be heavier and less efficient than derailleur gears. The weight over the rear wheel can make mountain bikes feel off balance, as ideally, you want the weight centered over the bottom bracket, which is why gearboxes are becoming popular for mountain bikes.
- Can be more expensive to purchase and repair
Types of internal hub gears (single-speed, 3-speed, 8-speed, etc.)
There are different types of internal hub gears designed for different types of riding:
Single-speed internal hub gears
These provide a single-gear ratio, making them a simple and low-maintenance option.
3-speed internal hub gears
These provide three gear ratios, making them a versatile option for urban commuting and recreational riding.
8-speed internal hub gears
These provide eight-gear ratios, making them a great option for riders who want more versatility and range.
14-speed internal hub gears
The brand Rohloff makes a renowned 14-speed hub that’s meant to be almost as efficient as a derailleur (95%). great for cycle touring and bike packing for added reliability.
Gearbox Gears
How gearbox gears work
Gearbox gears work by transmitting power from the engine to the wheels through a series of gear ratios. Each gear ratio is created by combining different-sized gears, which mesh together to transfer power from the engine to the wheels. By changing the size of the gears used in the transmission, different gear ratios can be created, allowing the rider to adjust the torque and speed of the bike.
Pros and cons of gearbox gears
Pros:
- Gearbox gears provide a wider range of gear ratios than a single-speed drivetrain, which allows riders to comfortably tackle different terrain and conditions.
- Gearbox gears can also provide a smoother and more efficient power transfer than traditional derailleur gears, which can suffer from slippage and inefficiencies due to the nature of the system.
- Gearbox gears are also less prone to damage from external factors like debris and dirt, which can cause derailleur gears to fail.
Cons:
- Gearbox gears are generally heavier and more expensive than traditional derailleur gears, which can make them less appealing to riders looking for a lightweight and affordable bike.
- Gearbox gears can also require more maintenance and adjustment, as they are a more complex system that requires specific tools and knowledge to service.
Types of gearbox gears
There are several types of gearbox gears available for bikes, each with their own advantages and disadvantages. Some of the most common types include:
Continuously Variable Transmission (CVT): CVTs are a type of gearbox that uses a belt or chain to transmit power between two variable-diameter pulleys. They offer an infinite range of gear ratios and are known for their smooth and efficient power transfer.
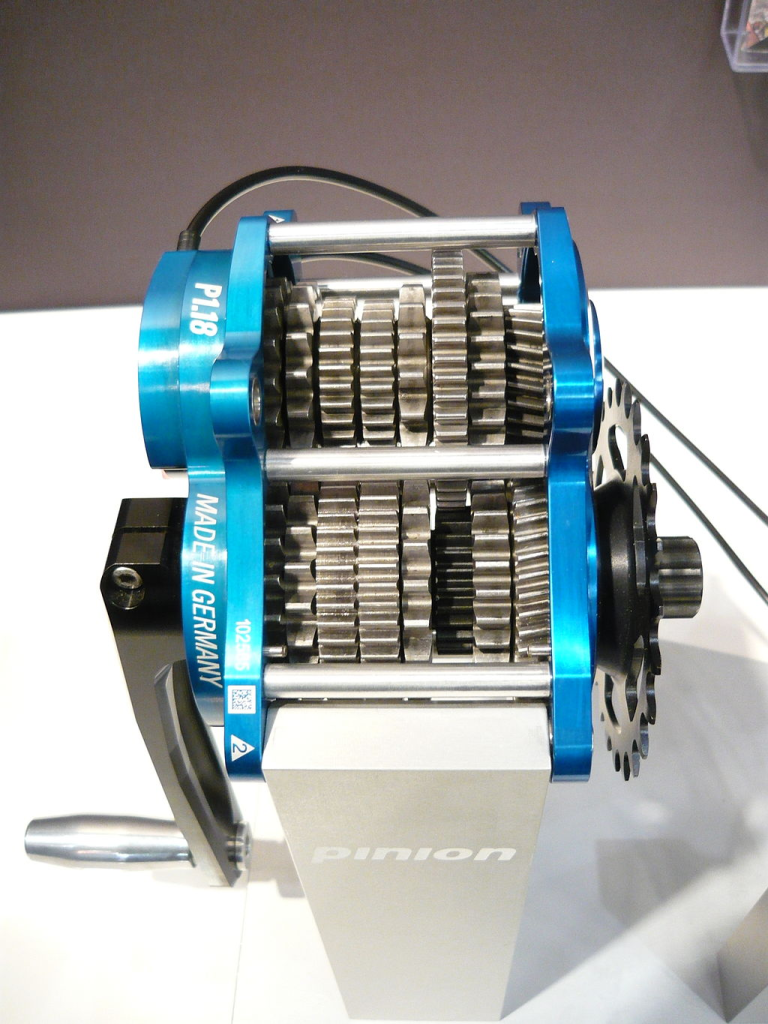
Pinion Gearbox: Pinion gearboxes are located in the bottom bracket of the bike and offer a wide range of gear ratios. They are known for their simplicity and low maintenance requirements but can be heavier and more expensive than other types of gearbox gears.
Which drivetrain to choose?
Here is a table comparing the key features of derailleurs, gear hubs, and gearboxes:
| Feature | Derailleurs | Gear Hubs | Gearboxes |
|---|---|---|---|
| Price | Affordable (ranging from $10-$500) | Expensive ((ranging from $100-$500) | Very expensive ((ranging from $1,000-$7000) |
| Weight (full system everything included with 500%+ range) | Light (typically <3lbs) | Heavy (typically >5lbs) | Heavy (between 3300-3900grams) |
| Efficiency | High efficiency | Moderate efficiency | High efficiency (close to a derailleur) |
| Shifting speed | Fast | Slow | Fast |
| Maintenance | Requires frequent cleaning and tuning | Low maintenance | Low maintenance |
| Suitable for | Road bikes, mountain bikes, cyclocross bikes, and other performance-oriented bikes. | Commuter bikes, touring bikes, and cargo bikes | Enduro mountain bikes, downhill mountain bikes, long-distance bike packing |
| Example products | Shimano Ultegra, SRAM XX1, Campagnolo Super Record | Shimano Nexus, Rohloff Speedhub, Shimano Alfine, NuVinci N380 | Pinion C-Line, Effigear, Zerode gearbox |
As you can see from the table, derailleurs are typically the most affordable and lightest option, making them a good choice for performance-oriented bikes like road and mountain bikes. Gear hubs are heavier and more expensive, but they require less maintenance and are a good choice for bikes that will be used for commuting, touring, or carrying cargo. Gearboxes are the most expensive and heaviest option, but they offer high reliability which suits long-distance bike travel, and also are also beneficial for enduro/dh bikes as you can improve suspension performance and don’t have to worry about damaging fragile derailleurs. Ultimately, the choice of the drivetrain will depend on the rider’s needs, preferences, and budget.
Does drivetrain weight matter? (Gearbox vs Derailleur)
The weight of your bike’s drivetrain can impact your riding experience, however, there is often a trade-off between weight, performance, reliability, and price.
Endurance riding and racing
if you’re a roadie or cross-country rider or racer, then you might be looking for all the weight performance gains possible so a high-end derailleur system might be the best option for you. Also, note 1x drivetrains (single font ring) are lighter than 2x or 3x drivetrains and can save you between 350-900 grams depending on the system you’re comparing it to. However, 2x and 3x drivetrains have smaller gaps between gears, making them a good choice for flatter terrain and less experienced riders.
Bike packing and travel biking
If you’re interested in bike travel or backpacking, a gearbox with a belt drivetrain might be a good choice. Gearboxes are sealed away from the elements, making them practically maintenance-free, and belts can last up to 25,000km. However, gearboxes are very expensive, so they may not be the best choice for everyone.
Enduro and DH bikes
When it comes to enduro and downhill suspension bikes, weight is certainly a factor to consider, but it’s not the only one. In fact, where the weight is located on the bike can be just as important as how much it weighs. A frame-mounted gearbox, for example, may be heavier than a traditional derailleur system, but it also reduces unsprung weight from the swingarm, since there’s no cassette or derailleur hanging off the back of the bike. This can lead to significant improvements in suspension performance and reliability. So, while weight should undoubtedly be taken into account when choosing components for your bike, it’s important to also consider how the weight is distributed throughout the bike and how it will impact your riding experience.
4. Bike Gear Components
If you’re new to cycling or just looking to upgrade your ride, understanding bike gears is essential. So let’s take a look into the different various components that make up a bike’s gear system, how they work, and which one might suit your needs.
Shifters (Cable)
Shifters are the controls used to change gears on a bike. Cable shifters work by pulling a cable to move the derailleur and shift the chain to a different gear. There are different types of cable shifters, including twist, trigger, and thumb shifters. Twist shifters are the most common on entry-level bikes, and they work by twisting the grip of the handlebar to change gears. Trigger shifters are found on higher-end bikes and work by using a trigger-like lever to change gears. Note that not all shifter brands are interchangeable with all derailleurs, try to stick to one brand like Shimano or Sram for both and you should be fine.
Derailleurs
Derailleurs are the components that move the chain from one gear to another. There are two types of derailleurs: front and rear. The front derailleur moves the chain between the chainrings on the front of the bike, while the rear derailleur moves the chain between the gears on the rear cassette or freewheel. Note there are different sizes of the derailleur, long cage derailleurs work with larger cassettes (commonly found on mountain bikes or 1x drive trains), and short cage derailleurs are commonly found in small lower ratio cassettes like on road bikes.
Cassettes and Freewheels
The cassette or freewheel is the set of gears on the rear wheel of the bike. Cassettes are found on modern bikes, while freewheels are found on older bikes. They both work by using a ratcheting mechanism that allows the wheel to spin freely in one direction but engages when pedaling, which drives the bike forward. The cassette or freewheel is attached to the hub of the rear wheel. For more info, we have a full article on FREEWHEEL VS CASSETTE | Which Is Better?
Chains
Chains are the components that transfer power from the pedals to the rear wheel. They consist of a series of links connected together with pins and bushings. Chains come in different widths to match the number of gears on the cassette or freewheel or also known as speed. For example, you would need a 10-speed chain for a 10-speed cassette. This is because cassette spacing is different depending on the speed of the cassette.
Belt drive
Belt drives are an alternative to traditional chain drives. They use a carbon fiber belt to transfer power from the pedals to the rear wheel, rather than a chain. Belt drives are known for being quieter, cleaner, and more durable than chain drives (can last up to 30,000km).
Chain vs Belt Drive: Which Is Better?
Chain drives are more common and less expensive than belt drives, but they require regular maintenance and lubrication. Belt drives are more expensive but require less maintenance and last longer.
Also, a study found that belt drives had an average efficiency of 98.6%, while chains had an average efficiency of 97.6%. This means that belt drives lose less energy and require less pedaling effort compared to chains. Belt drives also tend to be quieter and require less maintenance than chains, as they do not require lubrication or adjustment. (view the study here)
However, there are some disadvantages to using a belt drive. One major drawback is that belt drives are not compatible with all bike frames and components. They require specific frame and dropout designs, and cannot be used with derailleurs. Additionally, belt drives tend to be more expensive than chains and may be more difficult to find and replace if they break.
Electronic Drivetrain
Electronic drivetrains use a battery-powered motor to shift gears instead of a cable system. They offer precise, fast, and reliable shifting and are found on high-end bikes. Electronic drivetrains are more expensive than cable-driven systems, but they offer superior performance.
Hydraulic Drivetrain
Hydraulic drivetrains use hydraulic fluid instead of a cable to shift gears. They offer smoother, more precise shifting than cable-driven systems and can be found on high-end bikes however they are not very common. Rotor made a 13-Speed Hydraulic Drivetrain you can see a review here.
Final Thoughts
In conclusion, the Ultimate Guide to Bike Gears is a valuable resource for all cyclists who want to enhance their performance. By understanding gear ratios and choosing the right type of gear for your needs, you can achieve a smoother and more efficient ride. The gear ratio calculators provided in the article can help you determine the ideal gear ratio for your riding style, and by using the right combination of components, you can achieve the perfect gear ratio for your needs.
Remember, having the right gears is all about finding the right combination of components that suit your riding style and terrain. Whether you prefer derailleur gears, internal hub gears, or gearbox gears, there’s a solution that will work for you. By using the knowledge and tools provided in this article, you can optimize your cycling performance and enjoy a more comfortable and enjoyable ride. So get out there, explore, and find the right gears for your cycling adventures!
You may also like: